Reactive Caching with Redis using Spring Cache and Lettuce
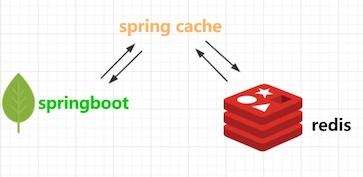
Caching is an essential technique for improving the performance of modern web applications. Redis is a popular in-memory data store that’s commonly used as a cache due to its high performance and scalability. In this tutorial, we’ll show you how to use Redis as a cache in a Spring Boot application using Spring Cache and the reactive Redis driver, Lettuce.
Prerequisites
To follow this tutorial, you’ll need:
- Java 8 or later
- Spring Boot 2.4.0 or later
- Redis 4.0 or later
Setting Up Redis
Before we get started, you’ll need to install and run Redis. You can download Redis from the official website or install it using your operating system’s package manager.
Once Redis is installed, start the Redis server by running the following command:
|
1 2 3 4 |
redis-server |
This will start the Redis server on the default port (6379).
Adding Redis Dependencies
To use Redis in a Spring Boot application, we’ll need to add the following dependencies to our project:
|
1 2 3 4 5 6 7 8 9 10 11 |
<dependency> <groupId>org.springframework.boot</groupId> <artifactId>spring-boot-starter-data-redis-reactive</artifactId> </dependency> <dependency> <groupId>io.lettuce</groupId> <artifactId>lettuce-core</artifactId> </dependency> |
The spring-boot-starter-data-redis-reactive dependency provides support for reactive Redis operations, while the lettuce-core dependency provides the Redis client implementation.
Configuring Redis
Next, we need to configure Redis in our Spring Boot application. We’ll do this by creating a RedisConnectionFactory bean, which we’ll use to create a ReactiveRedisTemplate.
|
1 2 3 4 5 6 7 8 9 10 11 12 13 14 15 16 17 18 19 20 21 22 |
@Configuration public class RedisConfig { @Value("${spring.redis.host}") private String redisHost; @Value("${spring.redis.port}") private int redisPort; @Bean public LettuceConnectionFactory redisConnectionFactory() { return new LettuceConnectionFactory(redisHost, redisPort); } @Bean public ReactiveRedisTemplate<String, String> reactiveRedisTemplate() { return new ReactiveRedisTemplate<>(redisConnectionFactory(), RedisSerializationContext.string()); } } |
In this configuration class, we’re using Spring’s @Value annotation to inject the Redis host and port from the application properties file. We’re then creating a LettuceConnectionFactory bean using the host and port, and using that to create a ReactiveRedisTemplate bean.
Using Redis with Spring Cache
Now that Redis is set up and configured, we can start using it in our Spring Boot application with Spring Cache. Spring Cache is a module that provides a consistent programming model for caching data in Spring-based applications.
To use Spring Cache with Redis, we’ll need to add the spring-boot-starter-cache dependency to our project:
|
1 2 3 4 5 6 7 |
<dependency> <groupId>org.springframework.boot</groupId> <artifactId>spring-boot-starter-cache</artifactId> </dependency> |
Next, we’ll need to enable caching in our application by adding the @EnableCaching annotation to our main application class:
|
1 2 3 4 5 6 7 8 |
@SpringBootApplication @EnableCaching public class MyApp { // ... } |
Now we can use Spring Cache annotations to cache data in Redis. Here’s an example:
|
1 2 3 4 5 6 7 8 9 10 11 |
@Service public class MyService { @Cacheable(value = "myCache", key = "#id") public Mono<MyObject> getById(String id) { // Perform database query to fetch MyObject by ID } } |
In this example, we’re using the @Cacheable annotation to cache the result of the getById() method. The value attribute specifies the name of the cache, while the key attribute specifies the key that should be used to cache the result. In this case, we’re using the ID of the object as the cache key.
If the result of the getById() method is already in the cache, the cached value will be returned instead of executing the method. If the result is not in the cache, the method will be executed and the result will be cached using the specified cache name and key.
Using Redis as a cache backend with Spring Cache is as simple as that. By default, Spring Cache will use the ConcurrentMapCacheManager as the cache manager. However, we can configure Spring Cache to use Redis as the cache backend by creating a CacheManager bean that uses the ReactiveRedisCacheManager implementation:
|
1 2 3 4 5 6 7 8 9 10 11 12 13 14 |
@Configuration public class CacheConfig { @Autowired private ReactiveRedisTemplate<String, String> reactiveRedisTemplate; @Bean public ReactiveRedisCacheManager reactiveRedisCacheManager() { return new ReactiveRedisCacheManager(reactiveRedisTemplate); } } |
In this configuration class, we’re creating a ReactiveRedisCacheManager bean that uses the ReactiveRedisTemplate created earlier. We can then use the @CacheConfig annotation to specify the cache manager for our MyService class:
|
1 2 3 4 5 6 7 8 |
@Service @CacheConfig(cacheManager = "reactiveRedisCacheManager") public class MyService { // ... } |
In this example, we’re using the @CacheConfig annotation to specify that the reactiveRedisCacheManager bean should be used as the cache manager for the MyService class.
Conclusion
In this tutorial, we’ve shown you how to use Redis as a cache backend in a Spring Boot application using Spring Cache and the reactive Redis driver, Lettuce. We’ve looked at how to set up and configure Redis, and how to use Spring Cache annotations to cache data in Redis. We’ve also looked at how to configure Spring Cache to use Redis as the cache backend.
By using Redis as a caching layer, you can improve the performance of your Spring Boot application and reduce the load on your database. With Spring Boot’s support for reactive Redis operations and Spring Cache’s consistent programming model for caching data, you can easily build high-performance, reactive applications that can handle high loads with ease.


